Difference between revisions of "GarminNS430"
(Created page with " == Controls == 500px == Interface == The GNS430's main pages are divided into 4 page groups Each group is comprised of multiple pages: {| class="wi...") |
(No difference)
|
Latest revision as of 06:03, 20 February 2020
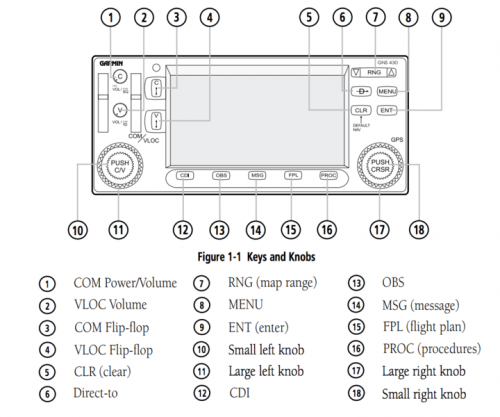
Controls
Interface
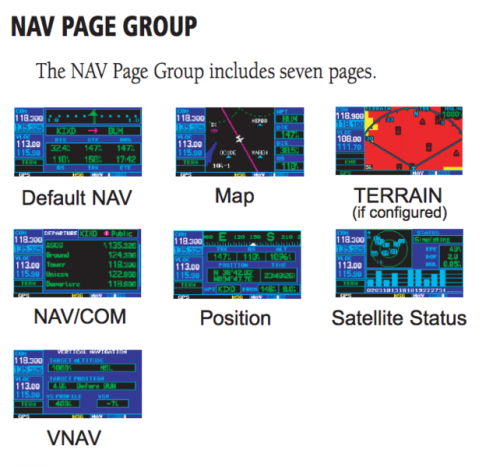
The GNS430's main pages are divided into 4 page groups
Each group is comprised of multiple pages:
| Page Groups | |||
| NAV Group | 7 NAV pages | ||
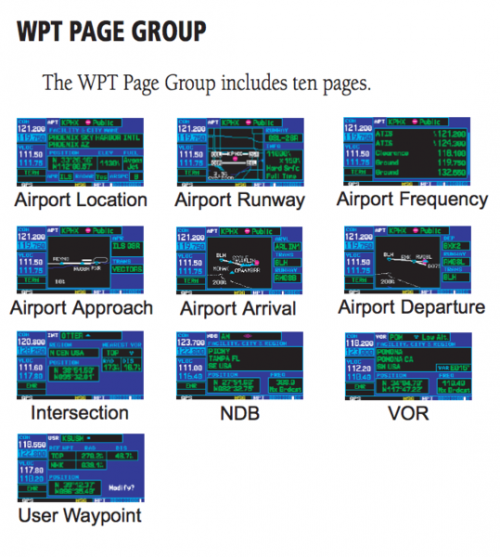
| WPT Group | 10 WPT pages | ||
| AUX Group | 4 AUX pages | ||
| NRST Group | 8 NRST pages | ||
To select the desired page group
Press and hold the CLR Key to select the Default NAV Page.
Turn the large right knob to select the desired Page Group.
To select the desired page
Turn the small right knob to select the desired page.
NAV Pages
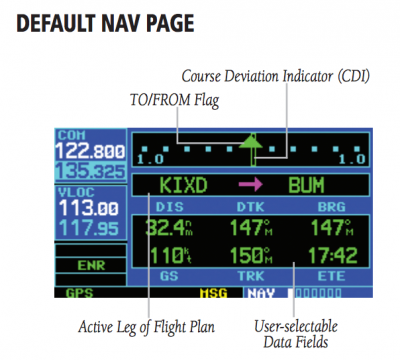
Default NAV Page
Note: To Quickly Display the Default NAV Page: From any page, press and hold the CLR Key for approximately two seconds
Map Page
Map Setup
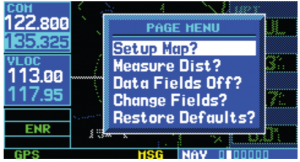
To display the Map Page Menu:
Press the MENU Key with the Map Page displayed (Figure 3-16).
Map Page Menu
The following options are available: ‘Setup Map?’, ‘Measure Dist?’, ‘Data Fields Off?’, ‘Change Fields?’, and ‘Restore Defaults?’.
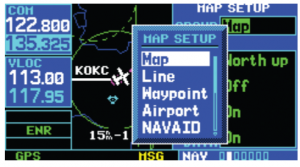
‘Setup Map?’ allows configuration of the Map Display to individual preferences, including map orientation, land data enable/disable, Jeppesen data enable/disable, automatic zoom, airspace boundaries, and text size.
To change map orientation:
1) From the Map Page Menu, turn the large right knob to highlight ‘Setup Map?’ and press the ENT Key.
2) Turn the small right knob to select ‘Map’ and press the ENT Key.
Map Setup Window
3) Turn the large right knob to highlight the ‘Orientation’ field.
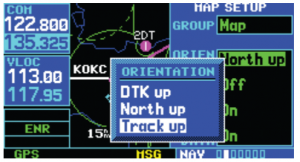
4) Turn the small right knob to select the desired option.
a) Select ‘DTK up’ to fix the top of the Map Display to the desired course.
b) Select ‘North up’ to fix the top of the Map Display to a north heading.
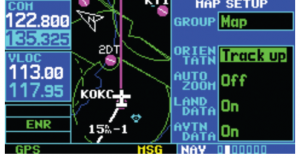
c) Select ‘Track up’ (Figure 3-18) to adjust the top of the Map Display to the current track heading.
Orientation Window
5) Press the ENT Key to accept the selected option
Map Setup Page
set date fields ON
press Menu once
right dial scroll to Data Fields
press ENT once to select
and return to map screen
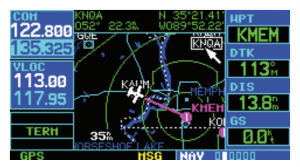
data fields are now displayed down the right edge of the Map screen
DIRECT-TO NAVIGATION (add a waypoint manually)
To select a direct-to destination from the Map Page
1) Select the Map Page from the NAV Page Group.
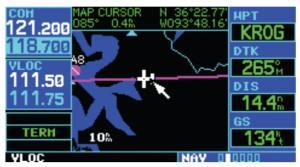
2) Press the small right knob to display a panning pointer.
3) Turn the small and large right knobs to place the panning pointer at the desired destination location.
4) If the panning pointer is placed on an existing airport, navaid, or user waypoint, the waypoint name is highlighted. Press the Direct-to Key and the ENT Key twice to navigate to the waypoint.
5) If the panning pointer is placed on an open location, press the Direct-to Key then press the ENT Key twice to create a ‘+MAP’ waypoint and navigate to it.
WPT Pages
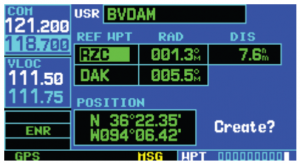
User WPT Page
add current location as a waypoint
Creating User Waypoints from the Map Page
The Map Page and panning target pointer (Section 3.4, Map Panning) provide a quick means of saving the present position as a user-defined waypoint.
To capture and save the present position as a user waypoint:
1) With the Map Page displayed, press the small right knob to activate the panning function. The target pointer appears at the present position
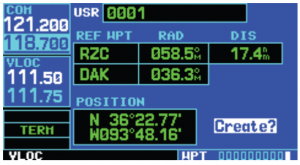
2) Press the ENT Key to capture the position and display the User Waypoint Page
3) A four-digit name is automatically assigned to the waypoint. To change this name, turn the large right knob to highlight the name field, then use the small and large right knobs to select a new name. Press the ENT Key to accept the selected name.
4) The cursor moves to the ‘Create?’ action field. Press the ENT Key to save the new waypoint.
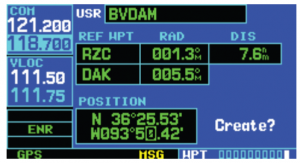
To create a new user waypoint by entering its latitude/longitude position:
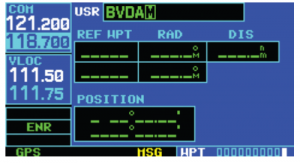
1) With the User Waypoint Page displayed, press the small right knob to activate the cursor.
2) Use the small and large right knobs to enter a name for the new waypoint and press the ENT Key.
The present position appears in the position field at the bottom of the page.
To create a waypoint at the present position, turn the large right knob to highlight ‘Create?’ and skip to step 6
3) Turn the large right knob to highlight the position field at the bottom of the page.
4) Use the small and large right knobs to enter the position coordinates for the new waypoint
5) Press the ENT Key to accept the selected position.
6) The cursor moves to ‘Create?’. Press the ENT Key to add the new waypoint to memory.
7) Press the small right knob to remove the flashing cursor
back to Instruments
back to Navigation
